
The key word is reducing. No sanding process is completely free of dust, particularly around edges, corners and repairs. However, a professional dust-control system captures the vast majority of sanding dust at the source, keeping the work area cleaner and making a refinishing project far more manageable for occupied homes, rental properties and renovation schedules.
What Dustless Floor Sanding Actually Means

Professional floor sanders remove the old finish and a controlled amount of wood to level the surface, erase scratches and prepare it for stain and protective coats. In a dust-controlled setup, the sanding equipment is connected to high-capacity vacuum collection. Fine particles are drawn away as the machine works instead of being allowed to settle across rooms, cupboards, furnishings and ventilation grilles.
This is very different from simply placing plastic sheets in doorways or using a domestic vacuum after the work is done. Containment still matters. A qualified contractor should protect adjoining areas, close off openings where appropriate and clean between sanding stages. Dust extraction is one part of a careful process, not a substitute for site preparation.
For homeowners, the most noticeable benefit is less cleaning after the job. For the floor itself, better dust control also helps create a cleaner surface before staining and finishing. That matters because loose debris can affect how evenly a finish lays down and how smooth the completed floor feels underfoot.
Why the Process Matters in Lived-In Homes
San Francisco Bay Area properties often have original oak flooring, narrow plank layouts, stairs and rooms that flow into one another. They may also have furniture, built-in cabinetry or recently renovated areas that need protection. A contractor who treats sanding as only a rough preparation stage can create unnecessary disruption. A specialist treats the property as carefully as the timber.
Dustless floor sanding is particularly useful when homeowners are remaining in the property during part of the work, when a property manager needs to turn around a rental efficiently, or when a seller wants a visible improvement before listing. It does not eliminate the need to move furniture, restrict access or allow proper drying time. It does reduce the clean-up burden and keeps the project more controlled.
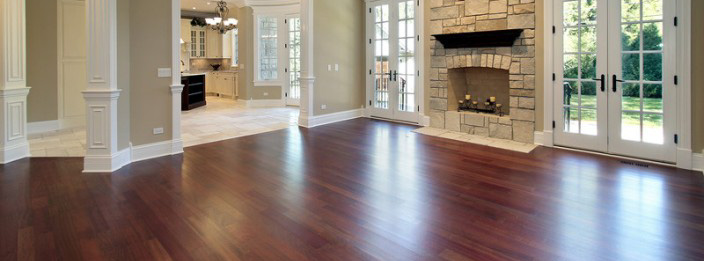
The result can be dramatic. Floors that appear permanently grey, scratched or patchy frequently reveal warm grain and natural variation once old coatings are removed. A fresh finish also provides a protective layer against everyday wear, helping the restored wood continue to add value to the property.
The Floor Must Be Suitable for Sanding
Not every wood-looking floor can be sanded in the same way. Solid hardwood is generally the best candidate because it has a substantial wear layer and can often be refinished more than once during its life. Oak, maple and other solid species can usually be repaired, sanded, stained and sealed when they are structurally sound.
Engineered flooring requires a more cautious assessment. Some engineered boards have a thick enough hardwood veneer for a light professional refinish, while others are too thin to sand safely. Aggressive sanding can cut through the veneer and expose the core beneath it. Laminate and many vinyl products cannot be refinished at all, even if their appearance resembles timber.
Water damage, termite damage and moisture-related cupping also need attention before sanding begins. Sanding a floor that is still damp, loose or badly distorted will not solve the underlying failure. In some cases, affected boards need replacing first. In others, a moisture issue below the floor or in the surrounding structure must be corrected before restoration can proceed.
A proper inspection prevents expensive mistakes
Before authorising work, ask for an in-home assessment of the floor type, thickness, condition and repair needs. The contractor should identify deep pet stains, gaps, loose boards, previous patching, damaged sections and transitions to other flooring. These details affect both the scope of work and the final appearance.
It is also worth discussing expectations around colour. Stain can change the tone of timber, but it does not erase every natural variation, old repair or mineral mark. Some homeowners prefer a clear finish that celebrates the original grain. Others choose a custom stain to update orange-toned oak, blend repairs or suit a wider renovation. Both approaches can work well when the floor is properly prepared.
What Happens During a Professional Refinishing Project
The exact sequence depends on the floor, but the work should follow a disciplined order. First, rooms are cleared and the work area is protected. Any agreed repairs, board replacements or fastener corrections are completed before major sanding starts. The main floor is then sanded in stages, beginning with the grit needed to remove old coatings and flatten wear, then progressing to finer abrasives for a smooth surface.
Edges, corners and areas around fixed features require separate equipment and skilled handling. These are the areas where poor workmanship can leave visible swirl marks, uneven colour or an over-sanded border. After the floor is carefully cleaned, stain is applied if selected, followed by the chosen sealer and finish system.
The final coats need time to dry and cure. Dry-to-touch is not the same as ready for rugs, furniture or heavy traffic. Temperature, humidity, product selection and ventilation all influence the schedule. A professional should provide clear instructions for re-entry, furniture replacement and the first weeks of floor care.
Choosing the Right Finish for Daily Use
A floor finish should suit the way the property is used, not merely the look of a sample board. Households with children, pets or frequent entertaining may prioritise a hard-wearing finish and a sheen that hides small scratches. A low-sheen matt or satin finish often gives a natural appearance and makes routine marks less obvious than a high-gloss surface.
Colour also changes how wear is perceived. Very dark stains can look striking but may show pale scratches, dust and pet hair more readily. Very pale finishes can make a room feel larger, although they may highlight dark gaps or marks between boards. There is no universal best choice. The right finish balances design, maintenance expectations and the existing condition of the timber.
National Floors uses a specialist assessment process to help owners make these decisions before work begins, rather than discovering limitations after the old finish has been removed.
Questions to Ask Before You Book
The lowest quotation is not always the lowest overall cost. Refinishing involves machinery, abrasion choices, repairs, staining, finish chemistry and drying conditions. A rushed job may look acceptable at first but show chatter marks, uneven sheen, poor adhesion or premature wear later.
Ask whether the contractor is licensed for hardwood flooring work, what dust-collection equipment will be used, how repairs are priced and which finish system is proposed. In California, a C-15 hardwood-floor specialist licence is a meaningful credential for this type of work. You should also ask whether the team follows recognised NWFA practices and whether your particular floor has enough material for the planned sanding.
Be clear about the project boundaries. Will baseboards remain in place? Are stair treads included? Who moves appliances or heavy furniture? Is there a separate charge for water-damaged boards or old adhesive removal? Straight answers at the estimating stage reduce unwelcome changes once work is under way.
Caring for a Newly Refinished Floor
Once the finish has cured, simple habits protect the investment. Use felt pads beneath furniture, place mats at exterior doors and address spills promptly. Sweep or vacuum with a hard-floor setting so grit does not act like sandpaper under shoes and chair legs. Avoid soaking the floor with water or using harsh cleaners that leave residue or compromise the protective coating.
A refinished floor does not need to look untouched to be successful. Timber develops character over time. The aim is to protect the finish, prevent avoidable damage and plan maintenance before wear reaches bare wood. When the surface begins to dull in high-traffic areas, a professional screening and recoating service may extend its life without requiring another full sanding.
If your hardwood is worn but structurally sound, replacement may be unnecessary. A careful assessment can show whether dust-controlled sanding, targeted repair and a well-chosen finish will bring back the floor you already own, with less waste and far more lasting value.
